I'm a little late with this, but here's the winner for Sara Lawson's ebook: Shelly! She said;
I LOVE making bags! All kinds. My favorite bags to make are tote bags. Amy Butlers market bag is a favorite of mine because it's so versatile. You can really switch it up, embellish and make it your own. Recently I took a Craftsy class, Design a Your Own Handbag, and now I'm obsessed with the recessed zipper bag! Would love to try one of Sara's!
Congrats Shelly! Can't wait to see what you make with this fun book. I'll email you with details.
Thanks everyone for entering! Have a fabulous Thanksgiving holiday. Enjoy friends and family! Eat LOTS of yummy food!

25 November 2013
05 November 2013
Big City Bags: Review and Giveaway!
I was over-the-moon excited when I was chosen to pattern test a bag pattern from Sara Lawson's new book, Big City Bags: Sew Handbags with Style, Sass and Sophistication (Martingale).
If you have ever googled bag patterns online, you've probably stumbled upon one or two of Sara's amazing bags...
You can order Sara's book TODAY! And really, you should. Each of the 12 bags in this book are incredible. Unique and different styles that you haven't seen before. New techniques, and lots of detailed, easy to follow pictures with clear instructions for each bag.
I had the opportunity to make the Miss Independent bag.

This is a large, awesome bag with leather handles I had never used leather handles before, and I have to admit, I was a bit nervous. I was unsure how they would look, since they are hand-sewn onto the outside of the bag. But Sara's instructions were fail-proof. Easy to understand and follow, with great diagrams/pictures. I was so proud of myself.

It has some great outer pockets with magnetic snaps, and a nice zippered interior pocket. Sara gives two methods of doing this interior pocket. Options. This is what we like.


I loved making this bag! There were a few thick parts that took lots of concentration and slow sewing, but with Sara's tips and tricks, it was totally do-able. (No needles were broken while sewing this bag!)

 |
| Photo from Big-City Bags by Sara Lawson, Martingale, 2013; used by permission. Photos by Brent Kane. All rights reserved. |
If you have ever googled bag patterns online, you've probably stumbled upon one or two of Sara's amazing bags...
 |
| Photo used courtesy of sewsweetness.com |
 |
| Photo used courtesy of sewsweetness.com |
 |
| Photo used courtesy of sewsweetness.com |
You can order Sara's book TODAY! And really, you should. Each of the 12 bags in this book are incredible. Unique and different styles that you haven't seen before. New techniques, and lots of detailed, easy to follow pictures with clear instructions for each bag.
 |
| Photo from Big-City Bags by Sara Lawson, Martingale, 2013; used by permission. Photos by Brent Kane. All rights reserved. |
The book begins with some fabulous information about interfacing. Sara is detailed in her explanations about which interfacings she uses in these bags from the book, and really describes why and how each works, the amount of stability it will provide, and how it will affect your bag.
 |
| Photo from Big-City Bags by Sara Lawson, Martingale, 2013; used by permission. Photos by Brent Kane. All rights reserved. |
Then she explains bag making techniques like zippers, pockets, magnetic snaps, purse feet, rings, locks, handles... you name it, it's in there.
 |
| Photo from Big-City Bags by Sara Lawson, Martingale, 2013; used by permission. Photos by Brent Kane. All rights reserved. |
I had the opportunity to make the Miss Independent bag.

This is a large, awesome bag with leather handles I had never used leather handles before, and I have to admit, I was a bit nervous. I was unsure how they would look, since they are hand-sewn onto the outside of the bag. But Sara's instructions were fail-proof. Easy to understand and follow, with great diagrams/pictures. I was so proud of myself.

It has some great outer pockets with magnetic snaps, and a nice zippered interior pocket. Sara gives two methods of doing this interior pocket. Options. This is what we like.


I loved making this bag! There were a few thick parts that took lots of concentration and slow sewing, but with Sara's tips and tricks, it was totally do-able. (No needles were broken while sewing this bag!)

So, do you want to win an e-book of Big-City Bags? Martingale has offered one of you the chance to win a digital copy of Sara’s book!
To enter the giveaway, just leave a comment on this blog post telling me your favorite bag pattern you've ever made.
Giveaway is open worldwide, and I’ll choose a random winner on Friday, 22 November, 2013. Good luck!
16 September 2013
class picnic...
Last month I did a sew-along. Whimsical Fabric Sew-Along. We made the Oliver + S Class Picnic blouse and shorts. It was a lot of fun, and I just LOVE the pattern!

I love the length of the sleeves, although shortening them would be cute too. LOVE a raglan sleeve. And the elastic across the top of the shoulder, genius. So sweet and feminine.

The sizing was spot on, although I may lengthen the shorts just a tad next time... growth happens almost over-night around here, and I hate thinking that she'll grow out of these too quickly.


Hazel really liked this outfit! I think this was her saying, "No! I won't listen to anymore directions on how to pose, or smile. I just want to play in my new clothes!!!"
Success.

I love the length of the sleeves, although shortening them would be cute too. LOVE a raglan sleeve. And the elastic across the top of the shoulder, genius. So sweet and feminine.

The sizing was spot on, although I may lengthen the shorts just a tad next time... growth happens almost over-night around here, and I hate thinking that she'll grow out of these too quickly.

I used the wrong side of the fabric, (a denim from Joann's), for the contrast bands on the shorts.
It was a quick sew. I had a hard time waiting for the group. I wanted to sew and just finish it up. But that's how I am. lack of patience.

Hazel really liked this outfit! I think this was her saying, "No! I won't listen to anymore directions on how to pose, or smile. I just want to play in my new clothes!!!"
Success.
23 August 2013
Hanami pattern review....
When I saw an email from An of Straight Grain, asking me to test her newest pattern, the Hanami, a top or dress with tulip or flutter sleeves & zippered back or criss-cross back, with or without collar, I was thrilled to say the least! This pattern was so easy and quick to sew-up, while teaching some new techniques at the same time. I loved it!

I made size 9/10, and let my daughter choose the sleeves and back that she wanted as well as either the top or dress. Phebe is 11, and still wears a size 10 in some shirts, but alas, this ended up being a bit snug on her. Thank goodness for a slightly younger wearer of 9/10. It fit perfectly. She loved it, and had fun modeling it for us.

Here's that cute criss-cross back. Isn't it so fun?! I love that it's not too low to feel uncomfortable, but just low enough to actually be noticed.

The instructions were super clear, with great photos to help along the way. An did a great job of including a table that breaks down which pages you'll need to print for the size you're making. It's nice to print only what you need, and not finding out after it's printed that you don't even need that page/piece.

Great instructions for how to assemble the pattern pieces. So helpful. And I loved that she includes a diagram on how to best lay out your pattern pieces to fit on your fabric... just like all the big pattern companies.

Lots of detailed photos and great instructions. I'm sad that my daughter can't wear this, but I have a 3-year old... there's another Hanami, (or two or three) in our future!

Thanks An for letting me test this super pattern! Thanks Whitney for having so much fun modeling for us.
Check out An's shop to pick-up your own copy!
24 June 2013
Bag It!
Back before Christmas, I mean like quite a while before Christmas, my sister Michelle and I decided that I should make us each a new purse.... with diaper bag function. So... after months of looking and deciding what we wanted for shape/size/color/pattern/lining, we finally figured it out. Here's what we ended up with...

We decided on the Emmaline Bag pattern by Emmaline Bags. Such a great pattern Isn't it such a cute shape?!

The pattern explains how to do a regular flat, patch pocket...

as well as a zipper pocket. Great explanation, and looks so professional. Magnetic snap closure.

We decided to add two bottle/sippy cup pockets, one on either end of the bag. These have actually ended up being probably my favorite pockets in the bag. I think I'll add at least one of these to every future bag I make.

And of course I had to add a cute little tag on the outside. My sister's had the yellow lining.

Mine has a bright green. LOVE!
20 June 2013
crazy!
It's been so LONG since I've visited this little spot. So here's a list of my excuses...
the kids finished the school year
we looked and looked and looked for a new house
we packed
we moved
we cleaned the rental house
we cleaned the new house
we unpacked (mostly)
I went to girl's camp
Hmm. That doesn't look like very much, does it? Anyway, it felt like a LOT. And now, in a few days, we're off to Utah to visit family, with a quick stop in Farmington, NM for my Grandma's funeral. She was my last living Grandma. Such a beautiful woman. Strong. Good cook. Stickler for detail. Loving. Proud of her children and grandchildren. Strange that she's gone.
Hope to do better with posting when we return in a couple of weeks... and you know, finish unpacking and decorating and arranging our lives in our new home.
Until then...
01 May 2013
KCW: 5 & 6
No finished item to show for these last two days.
I bought the Oliver + S Jump Rope dress pattern a couple of years ago, planning on making it for Hazel. It hasn't happened, until now.
I traced the pattern and cut out the fabric a couple of week ago, just waiting for this last week of kids sewing. Maybe I should have spent the whole week working on this one dress? But I really wanted more than one item to show for a week's worth of sewing. So it's not finished.

I guess I forgot to take a picture of my progress after my first day of working on it. But truthfully it wouldn't have looked much different than this one.
The first two steps you work on the placket and the collar. I'm thinking the rest of the dress will come together a but quicker, and I'm sure the second one would go faster too, but, this is where we are at the end of this sewing week. I'll be sure to post pictures when it's all finished.

All in all it was such a great week. Can't wait to finish this dress. Can't wait for the next KCW.
I bought the Oliver + S Jump Rope dress pattern a couple of years ago, planning on making it for Hazel. It hasn't happened, until now.
I traced the pattern and cut out the fabric a couple of week ago, just waiting for this last week of kids sewing. Maybe I should have spent the whole week working on this one dress? But I really wanted more than one item to show for a week's worth of sewing. So it's not finished.
I guess I forgot to take a picture of my progress after my first day of working on it. But truthfully it wouldn't have looked much different than this one.
The first two steps you work on the placket and the collar. I'm thinking the rest of the dress will come together a but quicker, and I'm sure the second one would go faster too, but, this is where we are at the end of this sewing week. I'll be sure to post pictures when it's all finished.

All in all it was such a great week. Can't wait to finish this dress. Can't wait for the next KCW.
30 April 2013
KCW 3 & 4
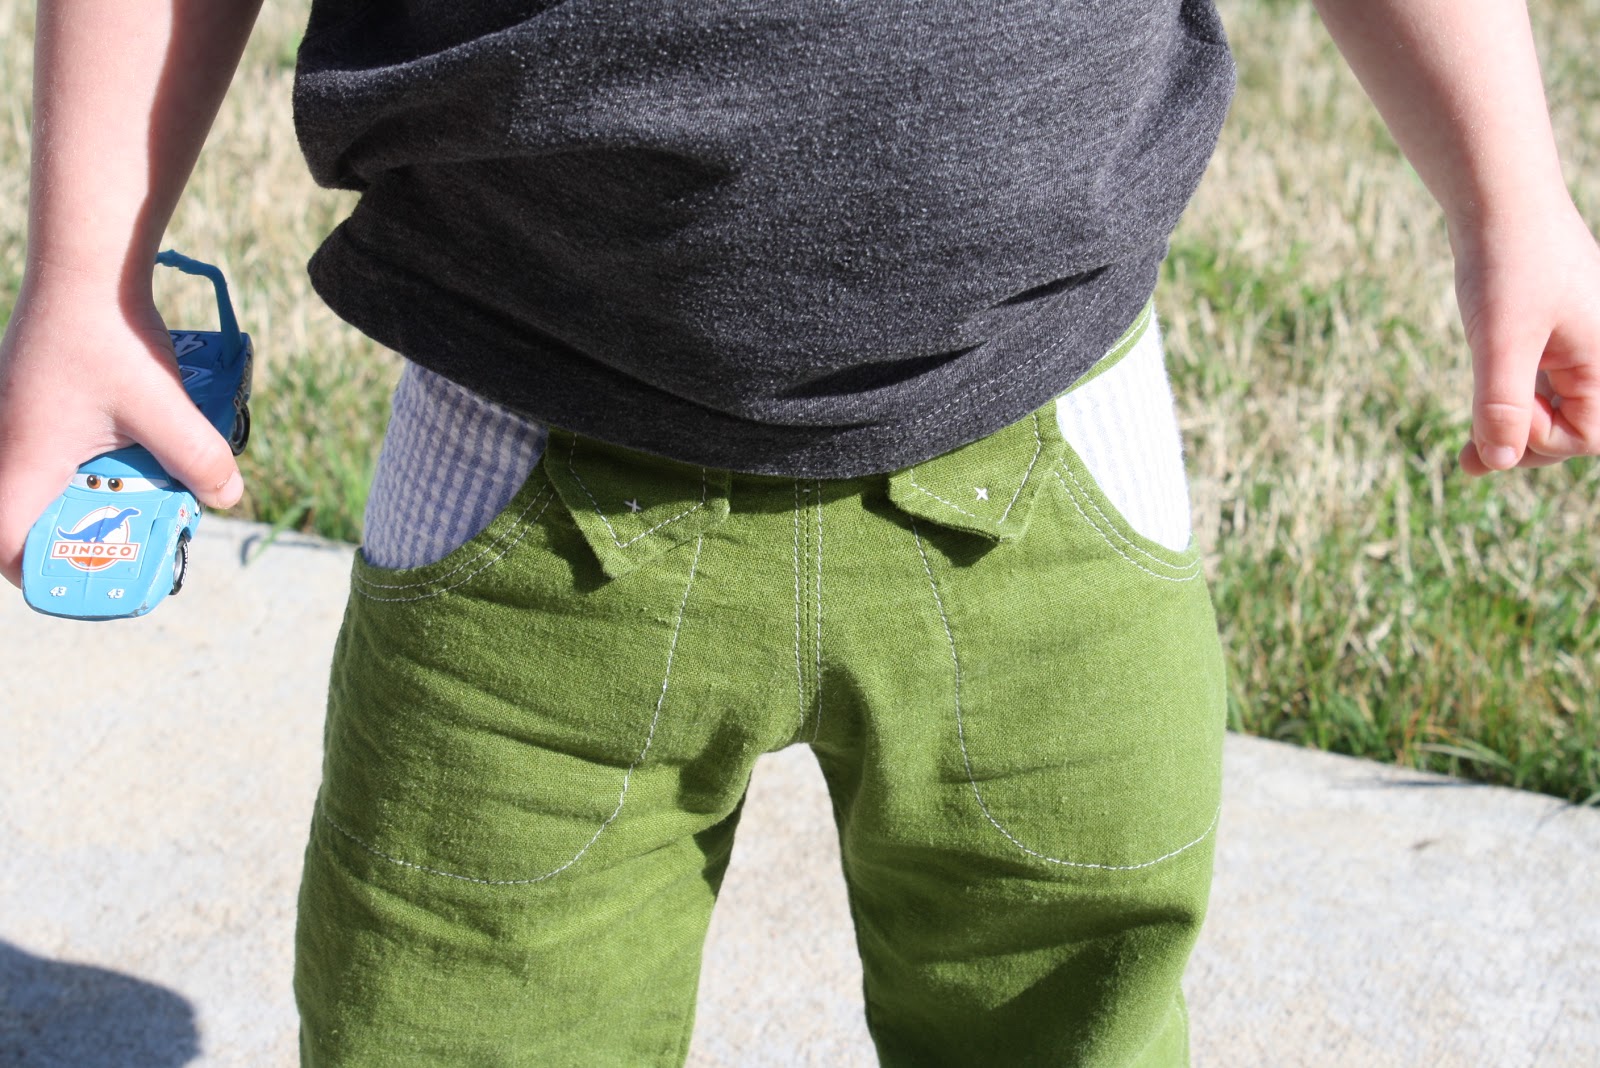
The next item on my list to sew, was some pants for Oscar. It's starting to get really warm here so I probably should have done shorts, but I just LOVE this pattern for pants, so it had to be done. Next time maybe I'll just shorten the pattern.

You might recall I made some, pretty much identical to these for Silas a few years ago. The green was a little brighter, and the size was bigger. I LOVED them. Silas LOVED them. I'm sure too that Oscar LOVES them.

This pattern is called the Nowhere Man Pants, by Shwin and Shwin. I made a size 12-18 months size. Oscar just turned 2, but the 2T seemed like it might be too big. I'm afraid that these won't fit him too long, so I'll be making another pair soon.

Love the tag on the bum. Cute pockets.


And an action shot...


You might recall I made some, pretty much identical to these for Silas a few years ago. The green was a little brighter, and the size was bigger. I LOVED them. Silas LOVED them. I'm sure too that Oscar LOVES them.

This pattern is called the Nowhere Man Pants, by Shwin and Shwin. I made a size 12-18 months size. Oscar just turned 2, but the 2T seemed like it might be too big. I'm afraid that these won't fit him too long, so I'll be making another pair soon.

Love the tag on the bum. Cute pockets.

And an action shot...

KCW: Day 1 & 2
Last week was Kids Clothes Week... the idea is that you sew for (at least) one hour for 7 days, making children's clothes. I gave it a go a couple of years ago and maybe made it for 3-4 days. This year I completed 6 of the 7 days. That's progress!
I'm always sure I'm going to be able to complete more than I do, but I'm happy with what I finished.
I started with this gray skirt for Hazel. I had the measurements figured out, but hadn't cut the strips, so for the 1st day I only got this far. Amazing how long it takes to cut, serge and piece the strips.


From her expression you wouldn't guess that she was excited to be wearing and having pictures taken of this skirt... I think it was the sun in her eyes.
I'm always sure I'm going to be able to complete more than I do, but I'm happy with what I finished.
I started with this gray skirt for Hazel. I had the measurements figured out, but hadn't cut the strips, so for the 1st day I only got this far. Amazing how long it takes to cut, serge and piece the strips.

Day 2 I finished the skirt and got a little cutting out done for day 3. Hazel LOVED the skirt, which always makes it so worth it. As I was working on it she walked by repeatedly just to verify that this skirt was being made for her. Pretty cute.
I used this tutorial for the skirt. It was great! I want to make a ton more of these, and since it's all off of measurements, it can easily be made in a larger/longer size too. I'm thinking Sadie and Phebe need some cute tiered maxi skirts. And me too.


From her expression you wouldn't guess that she was excited to be wearing and having pictures taken of this skirt... I think it was the sun in her eyes.
Subscribe to:
Posts (Atom)