Showing posts with label yeast. Show all posts

01 August 2012

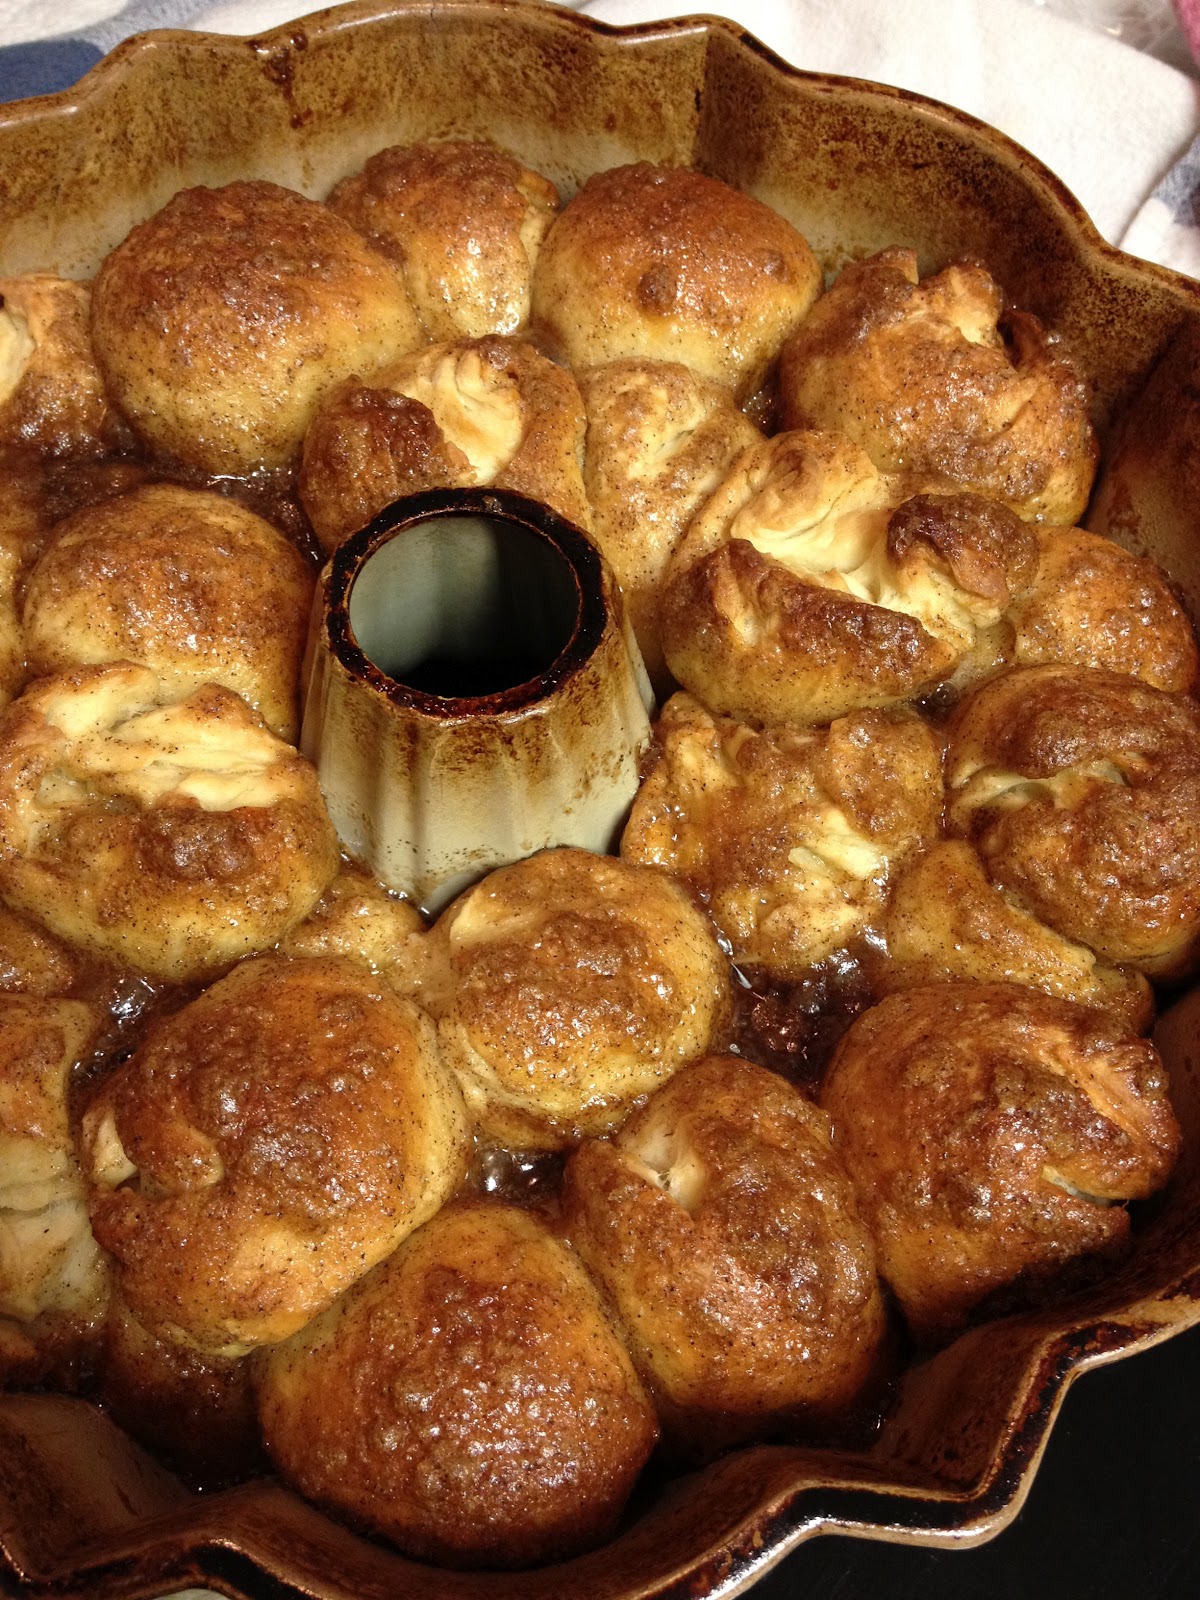
bake 52: monkey bread

Monkey.  Bread.  For as much great information as this recipe book contains, even they don't know exactly why the title, "monkey bread".  But you know, who really cares?  A recipe this good, can be called anything.  It'd still get eaten.

Start with the basic sweet dough recipe.  I didn't take pictures of all the steps of the dough since it's all pretty much the same method, and similar ingredients to the other dough recipes, here and here.

So, make the dough, and let it rise once.


Combine the brown sugar and cinnamon.


Cut the dough into 36 pieces.


Melt the butter.


After rolling each piece of dough into a ball, dip into the butter, and then roll in the cinnamon and sugar.  Covering completely.


Place in a greased bundt pan.


Continue staggering the balls in the pan.  Pour any remaining butter and cinnamon/sugar mixture over top of rolls.  Allow to rise again.  Bake.


After baking, let cool for 5 minutes in the pan.


Turn upside down on plate, and allow to cool another 5 minutes.


Make the glaze.  (Milk, powdered sugar, and vanilla).


 Drizzle over monkey bread.


Serve.  Try not to eat the whole thing.  Good luck with that.


I can see us making this over and over.

Check out Jenn Z.'s blog for the full recipe.


14 March 2012

Bake 52: Ciabatta Bread

An Italian white bread.  This recipe required first that a "sponge"be made.  A sponge is part of the flour, water and yeast from the regular recipe, that are allowed to sit out, covered, for 6-24 hours.  It helps in developing the taste, texture and chemistry in the bread.  But, also means that this is a two-day recipe.


Here's the beginning of my sponge, before it's all stirred together.


And there's the sponge.  It was then covered and allowed to sit all night, and most of the next day.


The next day I first made the dough, (no sponge yet).  I combined more flour, yeast and water in a stand mixer, and mixed until the dough came together.  There it is... all together.   Isn't it nice when things really come together?!


That dough is then covered to rest for about 20 minutes, then the sponge is added.  Gloppy, glop, glop. Oh, along with some salt.


Mix until it's all uniform and "together".


The dough is then put in a large oiled bowl, and covered with plastic wrap.  Rise for 1 hour.


Then we dust the dough with flour, and "turn" it.  There were some great pictures in the book that really illustrated how this was supposed to be done.


Basically you should have a plastic bench scraper to really do this well, I think.  It said a rubber spatula would also work, but I found it a bit tricky.  I don't think it worked quite as well.  One-third of the dough is supposed to be folded into the center, and then the other side, folded over the first.  Then, the whole thing is supposed to be folded in half, perpendicular to the first folds.


It said after all the folding, the dough should look roughly like a square.  Did NOT get that quite right.  The dough is then covered again, and should rise until tripled in size, about 1 hour.


The dough is turned onto a floured counter, and dusted with more flour... it's a REALLY wet and sticky dough, if you can't tell from the pictures, hence all the flour, dusting.


Divide dough in half and quickly lift each half onto a parchment lined, upside down rimmed baking sheet.


The dough is folded, each side into the middle.


And then stretched with fingers to 10 by 5-inch rectangle, and allowed to rise for 1-1 1/2 hours.


There is is, risen.  Then it's baked in a 500 degree oven on a stone.  You leave it on the parchment paper for the first 20 minutes of baking, then get rid of the paper, and turn it over so the bottom can get nice and crisp.  It continues baking for another 15 minutes.


There's the bottom of my first loaf.  Can you see that black around the edges.  Yep, slightly burned.


There's the top.  Lovely.  (There's a bit of sarcasm there.)


And there's the inside.  It was pretty.  And some nice big air holes/pockets developed, thanks to all that gluten development.


Here's my second loaf.  After my first one came out so dark, I read a tip in the book, that said to cook it for the first 10 minutes at 500 degrees, and then turn it down to 400 degrees for the remainder of the cooking time.  That's what happened here.  Better.


And still a nice crumb.

Ok.  So, even the slightly burned one tasted good.  It had a really crispy, almost cracker-like crust, and a chewy inside.  The flavor was good.  I was curious to see if it had a sourdough flavor, since the sponge is a somewhat similar idea.  I don't think it was sour, just really developed and nice.

It was a long process.  But it was also a yummy bread.  I don't know, I may try it again... there are some things I'd like to perfect and play around with a bit.  There is a version for a one day deal in the book, too.  So maybe I'll give that a go sometime.

For the complete recipe, go to Emily's blog.

15 February 2012

bake 52: Basic Pizza Dough

Who doesn't love pizza?!  And this was a great recipe to LOVE!

I'm a bit picky when it comes to homemade pizza crust.  Usually I don't love it... too thick... too bready... too undercooked, to name a few.  Pizza for me is about a thin, crispy crust, and really good toppings.  I thought this was a great recipe.  Great crust.  Simple.  Just right.

Starts with 5 ingredients:  flour, yeast, salt, olive oil and hot water.

The recipe actually suggests doing this in the food processor, but I don't have the dough blade, and I was afraid that it might not turn out right without it, so I just made it in the Kitchen Aid... and it worked great!


Mix the ingredients to form a dough.


Let rise to double.  (This picture was actually taken after it had been raising for a bit.  So, if you compare between the two risings, there may not seem to be much difference.)

Divide the dough in half and make two 14-inch pizzas.


I made cheese breadsticks out of half, and then a pizza from the other half.  It was perfect.  Used this recipe for the breadsticks.  So, even if you already have your own favorite pizza crust recipe, at the very least you should check out this recipe... it's the BEST!

As part of the recipe (well, the next page over actually), we tried the Quick Pizza Sauce.  It was okay.  I added some to it.  Originally it was just 1 can crushed tomatoes, garlic and olive oil.  So, I added a bay leaf, and some sugar.  I always add sugar to my pizza or pasta sauce.  Not a lot, maybe 1 Tbl.  Even to the store-bought stuff.  That way I can stand the store brand sauce.  Just adds a little sweetness, helps to cut the acid from the tomatoes.  Give it a try.


So, I simmered the sauce

And topped the pizza.


Then topped with cheese and pepperoni.

The recipe included some great tips on preheating the oven to the very hottest possible, 500 degrees.  Using a baking stone, on a lower rack.  I loved this crust, and will use it again.


 Great pick Betsy!  Visit her blog for the full recipe.

08 February 2012

Bake 52: Challah

Bread. Yum. I had no idea what Challah meant or was, etc. So I did a little research, (straight to Wikipedia, of course). Here's their definition of Challah... in case you were wondering too: "According to Jewish tradition... This "double loaf" (in Hebrew: lechem mishneh) commemorates the manna that fell from the heavens when the Israelites wandered in the desert for forty years after the Exodus from Egypt. The manna did not fall on the Sabbath or holidays; instead, a double portion would fall the day before the holiday or sabbath." There you go. Now you know. And, knowing is half the battle. I've always wondered what the other half is, but unfortunately, GI Joe never did expand on that one.

 On to the bread... I like making bread, or rolls. Growing-up we almost always had homemade rolls on Sunday. And probably had homemade bread more than store-bought. What can I say, I was spoiled. My mom is an excellent bread/roll maker. And, she taught me. I'm not sure that I'm as good as her, but I do really enjoy making bread. So this was a fun recipe.


 Here's a picture of the eggs, 2 large eggs and one egg yolk. Not sure why you need to see this picture, except that eggs are pretty. Yellow. Nice. Anyway, I did like that you save the white to use later to brush on top of the bread for the deep glossy shine. I always feel bad to throw the white away. Feels so wasteful.


 The flour, sugar, yeast, and salt are combined in the mixing bowl, and then the warm water, butter and eggs are then added while mixing. I usually add my yeast to the water/sugar mixture, and allow the yeast to soften and proof/grow a bit before adding the flour/salt, so this was different for me. But I listened, and followed their directions.


This cookbook is really good at giving time limits for everything... mix until the dough comes together, about 2 minutes... knead until the dough is smooth and elastic, about 8 minutes. It's nice. And helpful. Especially I think, if you haven't had much experience with bread-making. They're thoughtful that way.
 

Once it's all come together, you get to knead the dough by hand a bit, until it's a nice ball. Then place in a greased bowl and allow to rise. You'll see in my pictures, that my dough ball doesn't look like THAT much bigger after rising. But it really did sit for a long time. The recipe says to leave it for 1-1 1/2 hours... mine probably sat for 2-2 1/2 hours. There you go.


 The ball is then cut into two pieces. One twice as large as the other. Then each piece is cut into 3 pieces. Rolled into ropes, and braided.


The larger braid goes on the bottom, and is brushed with the egg wash. Then the smaller braid is placed on top, ends tucked under, and allowed to rise again.


 When the rising is complete. The whole thing is brushed with egg wash, sprinkled with sesame seeds or poppy seeds, and baked.


 And the finished product. I think it looks marvelous. And it was really yummy too. It was a fun recipe. I liked braiding the bread, and the end look, was just fun. The book said to try it the next day as french toast. We have yet to test this one out... but I'm thinking that might be a good idea.


 For the complete recipe, check out Jennifer's blog for the full recipe.